What Is A Check Valve?
About as essential as a part of a swimming pool can be, anyone asking what is a check valve is probably doing so for good reason. Thankfully, we have you covered and our in-depth article takes a thorough look at all things to check valves. These essential valves protect the piping and stop water from backflowing into the system it helps to ensure the water flows exactly how it should. But that doesn’t even touch the surface of what, they are, why they are useful, and how to make sure they are working properly. So, let’s find out the answers.
What Is A Check Valves Purpose?
These valves are found in a circulation system to make sure water does not flow backward when switched off. This keeps all the working plumbing safer as water is moving in the right direction. Gravity can cause water to move in the wrong direction if a check valve is not installed.
Are They Only Used In Pools?
No, a check valve can be found in a variety of plumbing from fountains to hot tubs. Most commonly found in an incoming suction pump for a raised pool pump, it keeps the water in place without risking it going backward. It should be installed in front of the pump, not too close and up to 18 inches away for it to be most effective. This compensated for a full basket and room in the piping for water.
There are other places a check valve can be installed such as on the skimmer, on vertical suction lines, and even on any main pipes for draining. If this is something you end up doing, be sure to install them on all vertical suction lines unless there is a closed valve in place.
Here are some of the other places where a check valve can be useful.
Solar Panel Lines
A strategically placed check valve on the solar panel lines will prevent the system from draining when switched off. This keeps the heat for longer, thus preserving energy. It can also be installed in the return piping to make sure water does not flow backward when the system is off.
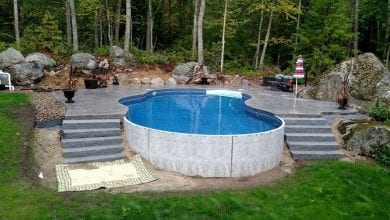
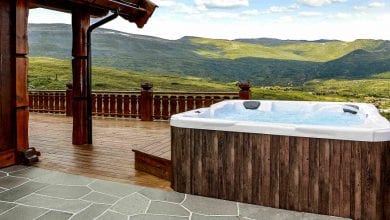
Raised Spa
Anyone lucky enough to enjoy the benefits of a raised spa will know that water will naturally drain south when the pump system is switched off. A check valve will be installed on a return line when on a shared system may so that when the pump is off, it does not lose gravity draining. The same can be said of water fountains and other garden features that are placed higher than the body of water it is flowing into.
Chlorinators
When installed too close to other equipment they can damage important parts of a pool such as a heater or a filter. When installed before the chlorinator, a check valve can protect excessive chlorine from playing havoc with other close parts.
Are Check Valves Useful During Winter?
Because a lot of pool owners winterize their pool, the piping ios left at the mercy of the elements for some time. This is another time where check valves come in handy. Air can be pushed through the skimmer into the piping without them. Another trick is to move the pump back from incoming valves. This will allow you to rearrange the pipes on the suction line, making room for horizontal pipes where a check valve can be installed.
The Different Types of Check Valves
There are two options a spring check valve and a spring flapper check valve. In the spring check valve, a spring opens and shuts an internal panel and can only be moved in one direction, thus keeping water from backwashing when the system is off. The spring flapper check valve uses a flap at one end, that moves against a spring when flowing in one direction, only to shut when the flow is moving in the opposite direction.
What Is Best Clear Or Opaque?
There isn’t a lot of difference as all the working parts are the same no matter what version you go for. The visibility is the only true difference. The benefit of using a clear valve is that it is easy to see if the flow is working as it should and if any debris is stopping it from working. The other benefit is that it is easy to spot and broken parts, or identify if the reason for the pool water not flowing as it should is down to a faulty check valve.
What Are Unions For Check Valves?
Some products will come with them, some without, but unions make it easy to remove a check valve without having to cut the line of the plumbing. They should always be usd in case there is a need to fix or replace the spring or the valve in its entirety. There are some brands making check valves that can be fixed through the top of the valve so there is no need to use unions. These are called ‘slips’ and are glued into place upon installation.
How To Remove Debris From A Check Valve?
Start by turning off the pump. Then the approach will depend on what kind of check valve is blocked so we will break it down into the following:
How To Remove Debris From A Spring Flapper Check Valve
First of all, make a note of which way the flow arrow is pointing, this will be important for reattaching later. Then, remove the check nut from the valve. Twist it counterclockwise until it comes off. Although it may be a little stiff, especially if not done before, twist the cover which will provide access to the valve.
From here, clear any debris that is causing the fault, and be sure to check the flapper and spring for any debris. This is also an opportunity to make sure the working parts are in good condition. On the underside of the cover is the O-ring. Inspect it for signs of damage, all being well, lubricate it with a silicone-based lubricant. If there are tears or other damage, replace the O-ring.
Now it is time to put the cover back on, ensuring the flow arrow is pointing in the correct direction. Hold the cover in place so the spring does cause it to come out of place and reattach the check nut, twisting clockwise.
How To Remove Debris From A Spring Check Valve
This is a lot easier when dealing with the commonly used union collars, so we will assume that this the following approach that will be most useful. First of all, make a note of the direction of the flow arrow then remove the union collars by unscrewing them, being careful to try and catch the check valve when it comes loose so it doesn’t crack on hard ground. NEct, remove any debris, being sure to check the spring and panel as these are common problem areas for leaves and the likes to get caught.
Now, inspect the O-rings on the collars. If they are damaged or stretched so that they have lost some of their shape, replace them. Alternatively, lubricate them with a silicone-based lubricant. Finally, place the check valve between the union collars and screw it back into place. Be sure to point the flow arrow in the correct direction.
How To Repair A Check Valve
The problem a lot of people have with aged check valves is that they can leak which can prove costly in wasted water and cause repairs. Start with the same process as when removing debris to take the check valve off the line, or open it up to inspect the damage.
Then, it should be easy to see which part is faulty. Some parts are difficult to repair and will require a new check valve to be installed. If it is the spring that is not working, first remove the spring shaft from its side, then remove the flapper. The spring should then come off the ends with a little pull. After this, install a new spring, reattaching the flapper and then the spring shaft.
Replacing an O-ring should be easy as they are easy to remove and unless it has lost its shape or is torn, will usually get by when lubricated with a silicone-based lubricant.
Like we said, not all check valves can be repaired. This is especially the case with spring check valves as they are fixed into place via glue, or it is difficult to access the inside of the valve. Thankfully, replacing these check valves is not expensive.
How To Replace A Check Valve
Always switch the pump off before getting started. This process is easier when replacing a spring check valve attached via union collars. It is only a matter of untwisting the collars, allowing the current spring check valve to detach, and install the new one after inspecting the O-rings for signs of damage and either replacing or lubricating.
Thankfully, a spring flapper check valve is easier to repair, so a complete replacement is less likely. However, if this is the case then turn off the pump and remove the valve by cutting the line on either side with a hacksaw. Give yourself about an inch of room from the valve when cutting.
Next, measure the gap between the cut ends as a connector will need to be placed on either side, along with short piping that the new check valve can go in. Before committing with glue, make sure it is a good fit by connecting all the new connectors, piping, and spring flapper check valve. Make sure there are no gaps and then check the flow arrow is pointing in the correct direction. Then glue it into place using ‘PVC Cement’. Following the guidelines outlined by the brand but usually, it is a case of waiting around 2 hours for the glue to dry before the water can be switched back on.
Does My Pool Need A Check Valve?
The short answer is yes it does. Any chlorinated pool will want one so that water cannot backwash into the system and play havoc with some of the working parts. A check valve needs to be placed between a chlorinator and whatever precedes it in the lines which is usually a heater or filter. These are two parts that can be damaged, and cause costly repairs if chlorine is allowed in the wrong direction.
Why Is My Check Valve Leaking?
There is an issue with the flow or broken parts. Follow the above guidelines on how to remove debris, but inspect for damage. A common sign can be that the check valve is vibrating. It can be the result of the flapper being open because debris has become lodged around this area. A leak can come from a damaged O-ring, seat, or other parts that connect the check valve to the piping.
The union collars may be loose after cleaning the check valve in which case, switch everything off at the pump and remove them before reattaching again.
How Long Should A Check Valve Last?
For the most part, a check valve that is cleaned and inspected every so often should last over ten years. If any repair work needs doing along the way then this is to be expected but replacing a check valve should not be something that needs to be done often. The best practice is to keep an eye on any debris building up, clean it every few months or when necessary, and any repairs should be sporadic, but it will probably be a few years between repairs.
How Much Does A Check Valve Cost?
This varies depending on the type but expect to pay anything between $40 – $500. Then quality and spec increases as the price goes up, but there is also the cost of labor should a professional come to install it. The simpler the valve, the easier the installation and anyone replacing a spring check valve attached via union collars will find that this ends up being one of the cheaper options overall.