How To Prime A Pool Pump?
For people who aren’t familiar with swimming pool technology or have never owned one, certain things might seem like they don’t make much sense. For example, priming a pool pump might seem like an unnecessary step to people who’ve never had to deal with it. However, we’re here to say that priming your pool pump is necessary and as a result, it’s something that both novice and experienced pool owners are just going to have to deal with. Even though most inground pool pumps should be able to prime themselves under most circumstances, there are exceptions to that rule.
Why Prime A Pool Pump?
When you prime a pool pump, you’re essentially purging the plumbing system of your pool of air. This creates a vacuum that pulls water from the pool and pushes it back through the filter and then out again via the return line. Once the pump has been primed, it doesn’t generally need to be primed again—at least, not until the system has been depressurized. There are times when the pool is going to have to be depressurized for things such as changing out the pump motor, cleaning the cartridge, and other such maintenance.
The Procedure For Priming A Pool Pump
Okay, let’s get down to nuts and bolts, shall we? In this section, we’re going to go through all of the steps that have to be done to properly prime your pool’s pump. Although pumps might differ from one another, the following procedure should apply to most pumps. With that being said, however, it’s always important for you to read the instructions that came with your pump and follow the recommendations of the manufacturer first and foremost.
Step One: Turn Off The Pool Pump
One of the first steps that have to be taken is to cut power to the pool pump. This is usually done by shutting it down at the circuit breaker for the pump—although some setups might have other ways to shut the pump down.
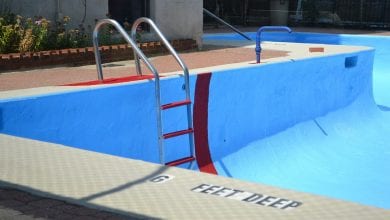
Step Two: Check The Pool’s Water Level & Skimmer
The next thing that has to be done is to check the pool’s water level. The water level of the pool should come up at least halfway up the face of the skimmer. While the water level is being checked, it’s a good time to go ahead and make sure the skimmer is clear of any debris.
Step Three: Adjust The Suction Side Diverter Valve
For those of you who are unfamiliar with the suction-side diverter valve, it’s the valve that allows you to select whether the pump will pull from either the main drain, the skimmer, or both of them. Use this valve to either close the skimmer line or the main drain so that the pump is only pulling from one line. This will help to concentrate the suction of the pump and will thereby increase the priming cycle’s efficiency.
Step Four: Open The Filter’s Air Relief Valve
The next step is to open the filter’s air relief valve. The air relief valve allows air to escape as the pump is being manually primed. When this valve is first opened, you’re likely to hear the hiss of air pass through the valve, don’t worry, this is normal. It’s also worth mentioning that most sand filters don’t have an air relief valve for you to worry about. These models have air relief tubes that release the pressure automatically.
Step Five: Remove The Pump’s Strainer Lid
Now is the part of the process where the pump’s strainer lid is removed. To remove the lid, turn the two knobs on top of the strainer lid counter-clockwise and then swivel the knobs away from the lid and down. If the strainer lid screws on instead of being attached to the box using knobs, then turn the lid counter-clockwise to unscrew the lid and remove it from the strainer box.
Step Six: Double Check The Strainer Basket
Now’s the time to check the pump’s strainer basket and make sure that it’s free of any debris. Debris in the pump’s strainer basket isn’t likely to derail the pump-priming process, but it will make it less efficient, so go ahead and clean out all of the debris that’s collected in it.
Step Seven: Fill The Strainer Basket With Water
Grabbing your handy-dandy hose, fill the strainer basket with water until the water has reached above the pump strainer’s intake port. If you don’t have a hose available, the same thing can be achieved with a bucket of water. Filling the strainer basket up to the intake port will ensure the suction pipe is completely emptied of air.
Step Eight: Reattach The Pump’s Strainer Lid
This is the part where the pump’s strainer lid is put back on. However, before you do that, it might be worth it to take a look at the strainer’s lid O-ring to make sure it’s in good condition. If it’s not, then replace the O-ring. Regardless of whether the O-ring actually needs to be replaced, it’s probably a good idea to add a new coat of lubrication to the O-ring—especially if that hasn’t been done in a while. This will prevent air leaks from the strainer lid in the future.
Step Nine: Check The Main Return Lines
Take a look at the main return line valve and make sure that it’s open. This will ensure that the pump can divert water into the pool. If it’s not open, then the pressure might build up to a dangerous level during pump operation and this could result in personal injury or damage to the pump.
Step Ten: Turn On The Breaker & Pump
Before accomplishing this step, you might want to double-check the work you’ve done up until now. When you’re satisfied that you’re following the proper procedure, go ahead and turn on the breaker and the pool pump.
Step Eleven: Keep An Eye On The Pump
Once the pump has been started, you should observe the pump’s strainer lid to make sure that water is flowing properly. After water initially flushes through the system from priming the pump, water should begin to flow freely and this water should fill the pump’s strainer basket. This should take a minute or less. If water hasn’t begun to fill the pump, then you should turn off the pump and start the entire process over again. If you still can’t get the pump to fill up with water, then you’re probably going to have to troubleshoot the pump. At the end of this guide, we’ll go over some of the steps for troubleshooting a pump that won’t prime properly.
Step Twelve: Keep An Eye On The Air Relief Valve
After you’ve determined the pump is filling with water, you should turn your attention to the air relief valve. At this point, it should still be open. However, when water begins to pour out of this valve, then close it. This valve is usually closed by turning it clockwise.
Step Thirteen: Reset The Suction-Side Diverter
This step is pretty simple. All that has to be done is to reset the suction-side diverter so that it pulls from both the skimmer and the main drain.
Step Fourteen: Check That Water Is Flowing
Approximately 30 to 60-seconds after the water has filled the pool pump, maybe sooner, water is going to flow into the pool. If that still isn’t happening, then shut down the pump, make sure to bleed the pressure, reopen the pump strainer, refill the pump’s strainer with water, and then make sure that the pump lid is properly closed. This step might have to be done several times to make sure that air is completely removed from the line.
Step Fifteen: Open The Drain Line & Close The Relief Valve
After you have made sure that water is going through the pool skimmer lines, then open the drain line at the diverter-valve. Open the relief valve to let the air in the main drain line get out. Once again, water should be flowing within 60-seconds. Now close the relief valve. Pressure should be building on the pressure gauge, and the strainer box should be full. If it isn’t, then start this process again.
How To Troubleshoot A Pool Pump That Won’t Prime
Now that we’ve gone through the steps on how to prime a pool pump, it’s time to turn our attention to troubleshooting any problems that might arise during the process. However, we’re not naive and we know that not all problems can be correct by the pool owner but instead require the help of a qualified pool technician. With that being said, however, below are some things that pool owners can do to troubleshoot the pump-priming process.
Step One: Check The Pool Level
Look at the water level of the pool. It should be about the mid-level of the skimmer opening. If it falls below that, then there’s a chance that air will be sucked into the circulation system and this will make the pool lose its vacuum.
Step-Two: The Strainer Basket Doesn’t Have Water
During the pump-priming process, it’s important to fill the strainer basket with water. If it doesn’t contain water, fill it with water and replace the pump strainer cover.
Step Three: Check The Skimmer Basket
If the skimmer basket is clogged, then the pump can’t be primed, so make sure that you clean out all debris from it with a hose.
Step Four: Check The Strainer Basket
The strainer basket should also be clear of debris. If it’s not, then clean it out with a hose. This basket needs to be clear to establish a proper vacuum.
Step Five: Check The Strainer Basket
You should check to make sure that the strainer basket cover isn’t leaking. If it is, then remove the gasket around the top of the strainer basket and examine it. If it’s cracked or is worn, then it will need to be replaced. Once you have determined the gasket is in good condition or have replaced it, carefully place it back in its groove and apply a silicone-based lubricant to it. Remember, it’s a good idea to periodically replace this gasket. Also keep in mind that if you use a non-silicone lubricant on this gasket such as Vaseline, it will corrupt the integrity of the gasket. Make sure that you only hand tighten the lid on the strainer basket and don’t over-tighten it.
Step Six: Make Sure Some Valves Are Open & Some Are Closed
The pool’s filtration system needs to have a path for the water to flow. To create that pat, there has to be one suction and one discharge valve open. That will allow the water to flow properly through the system.
Step Seven: Check For Leaks On Fittings
If your pool’s circulation system isn’t holding pressure, then there might be a leak in the glued or threaded fitting on the suction-side pump. Check each of the fittings and connections to make sure that there are no leaks. If there are leaks, then redo the connection.
Step Eight: Check The Impeller
If the pool pump’s impeller becomes clogged, then water won’t flow through it and this will result in a loss of suction. To combat this problem, all that has to be done is to make sure that the impeller is cleaned of all debris.
Step Nine: Get Help If Needed
The above steps will take care of most pump-priming problems. However, as we said at the beginning of this section, not all problems can be fixed by the pool owner. Therefore, if you experience a problem that can’t be addressed by any of our points, then hire a professional to handle the problem for you.